

How To Create Custom Activity In Uipath
How to publish your Custom Activity on UiPath Connect?
Introduction
RPA is a technology now gaining momentum and is used to automate manual tasks. What distinguishes RPA from traditional programming is it's easy-to-use graphical user interface (GUI). This technology can, therefore, make programming easier for the automation of graphic based processes. UiPath is a popular RPA tool. UIPath Community Edition is a freely available software to download on Windows.
What is Custom Activity?
An activity is a building block of an RPA solution. In addition to numeruos bulit-in activities, UiPath also offers a feature of creating and publishing a user-defined activity on it's MarketPlace, UiPath Connect. Custom Activity are resuable piece of code in the form of activity which you can use across all your projects. It is machine independent. In order to use any Custom Actitvity all you need to do is 'Click on Manage Packages' in the UiPath Studio and install the package and you're all set to use the activity in your project.
Steps to Publish on UiPath Connect
- Code your idea to life using UiPath Activity Creator Extension for Visual Studio. Prior to the coding, do ensure that you're not duplicating the idea that is already present on Connect
- Once you're done coding, build the solution or publish it
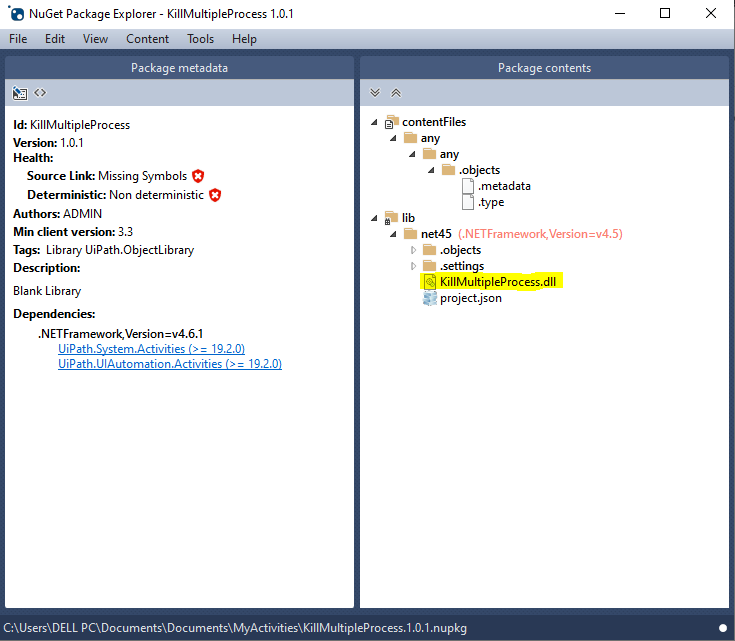
- Open Nugget Package Explorer
- In case you've published it using UiPath Studio, remove all the files except the '.dll' file
- If you've build the solution using UiPath Activity Creator Extension then while publishing all you need is to take care of the Configuration, there are two options, namely, Debug and Release. Release is for your final build, the one that goes in production or the one that goes on Connect whereas Debug is for the incremental change that you do while creating or developing a package. The only difference between these is that Release sets a defined version whereas Debug will timestamp the version of all your packages

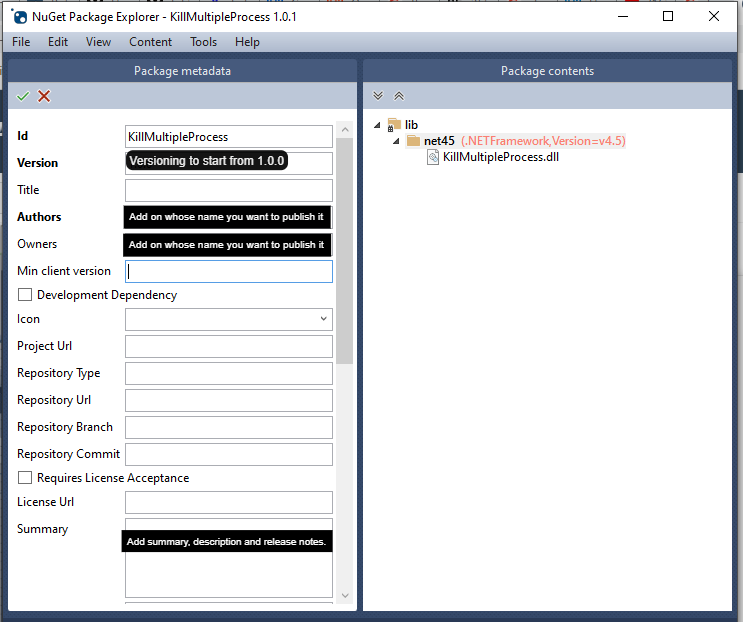
- Once you have the nupkg file in place with only '.dll' file in it, click on Edit MetaDeta icon placed on top left side of Nugget Explorer and enter all relevant details required for publishing
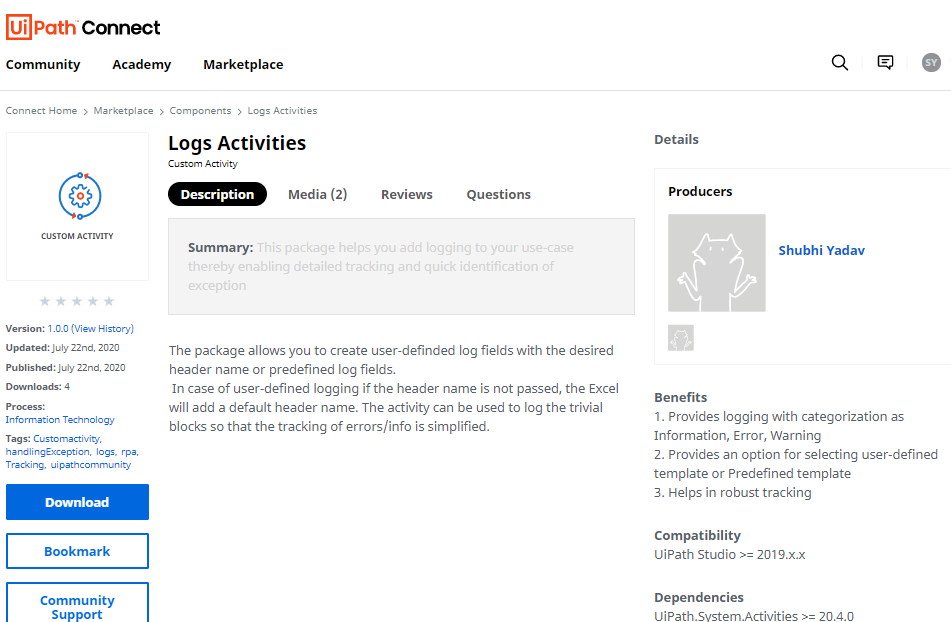
- Create your account on Connect and click on Upload Component
- Select the ComponentType as 'Custom Activity'
- Fill in all the required fields. You can copy it from the metadata of your Nugget Package
- Select the 'Component Target' as 'Downloadable Component'
- Upload the 'nupkg' file in Component Package
- Zip your project folder and uplaod underneath Source Code
- Provide relevant images and videos to explain the functioning of your Custom Activity
- Enter relevant tags in accordance with your Custom Actitvity
- Under Support, Select 'Enterprise Support' if you're publishing it in the name of your company and you'll provide support and bug fix, if any, within agreed SLA. You can select 'Community Support' if you're the sole owner of it with no agreement of support
- That's it, Click on Submit and you've just submitted your component to be published on UiPath's marketplace. It will be tested and reviewed by UiPath team for bugs and proper documentation. You'll be notified via mail if there's any change to be done in your activity
- Once it is published it will available for everyone to view and use
Things to consider before Publishing
- Follow all the best practices while coding viz. variable naming convention, exception handling etc
- Try using 'Simulate Click' in click activity
- Your activity should output the execption in a variable so that user is aware of the successful execution of it
- Add clear and crisp annotation to all your arguments
- The annotation in the arguments should clearly specify the data type of the input you want from the user and the direction of the argument (In, Out, In/Out)
- Give short and relevant name to your activity i.e. the name should be self-explanatory
- Delete all unnecessary dependencies before publishing
Want to learn how to Create Custom Activity?
You can learn that by watching the Playlist 'How to Create Custom Activity in UiPath?' on my Youtube channel.
That's it!
Congratulations on publishing your first component on Connect, and I hope you found the article helpful. For more insights into publishing other components viz. Snippet, WorkFlow Template, Solution etc. you may read this. Happy automation!
What's next?
You may take references from some of my own components on UiPath's MarketPlace (link is provided below). Connect to me over LinkedIn for any query or if you want to discuss your idea of Custom Activity.
- KillMultipleProcess
- LoginToSAP
- DownloadFromBrowser
- Add Logging to your project
How To Create Custom Activity In Uipath
Source: https://medium.com/@anmol.shubhi06/how-to-publish-your-custom-activity-on-uipath-connect-ce59728052da
Posted by: waterswittionfer93.blogspot.com
0 Response to "How To Create Custom Activity In Uipath"
Post a Comment